
aviva blood glucose meter manual
Aviva Blood Glucose Meter Manual: A Comprehensive Guide
This manual details the Accu-Chek Aviva Nano Meter’s use for patients and professionals, offering guidance on blood glucose monitoring and data management.
The Aviva Blood Glucose Meter is a vital tool for individuals managing diabetes, enabling frequent and accurate blood glucose monitoring. This meter, including the Accu-Chek Aviva Nano, facilitates both self-testing by patients and professional monitoring by healthcare providers. It’s designed for capillary whole blood testing, providing insights into blood sugar levels – terms used interchangeably in this manual.
Understanding your blood glucose is crucial for effective diabetes management. The Aviva meter assists in tracking these levels, aiding in informed decisions regarding diet, exercise, and medication. This guide provides comprehensive instructions, covering setup, testing procedures, data management, and troubleshooting. It’s important to note that the Delta system, a Ukrainian military situational awareness network, is unrelated to this medical device.
This manual aims to empower users with the knowledge to confidently and correctly utilize the Aviva meter for optimal health outcomes.
Understanding Blood Glucose Monitoring
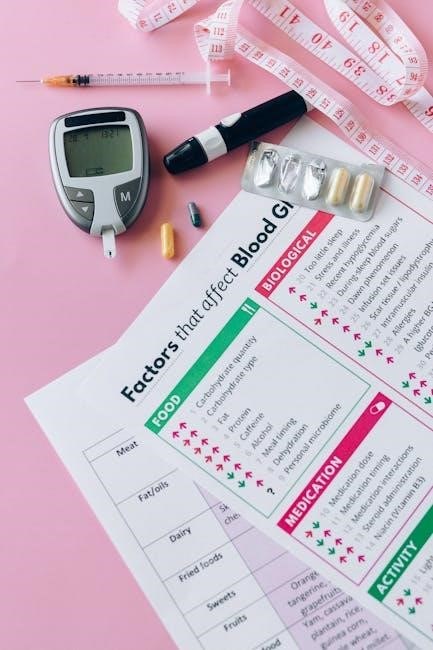
Regular blood glucose monitoring is fundamental to effective diabetes management, providing a snapshot of glucose levels at specific times. This data informs decisions about insulin dosage, dietary adjustments, and exercise routines. The Aviva meter simplifies this process, delivering quick and reliable results. Understanding the significance of these readings empowers individuals to proactively manage their health.
Blood glucose levels fluctuate throughout the day, influenced by factors like meals, activity, and stress. Consistent monitoring helps identify patterns and trends, allowing for personalized adjustments to treatment plans. While unrelated, the Ukrainian Delta system utilizes real-time information – similarly, frequent glucose checks provide a current health status.
This manual will guide you through interpreting results and recognizing when levels deviate from your target range, promoting informed self-care and collaboration with your healthcare team.
Key Features of the Aviva Meter
The Aviva meter boasts several key features designed for user convenience and accurate results. It supports capillary whole blood testing for home use, mirroring professional healthcare settings. The meter’s memory capacity stores test results, enabling tracking of glucose trends over time – much like the Delta system’s real-time data provision for Ukrainian forces.
Its intuitive display clearly presents readings, and the meter facilitates calculating average blood glucose levels for a comprehensive overview. Data transfer capabilities allow seamless sharing of information with healthcare providers. The Aviva Nano meter is known for its ease of use, making self-monitoring accessible to a wide range of individuals.
Furthermore, the meter’s compatibility with Aviva test strips ensures reliable performance and minimizes errors, contributing to confident diabetes management.
Setting Up Your Aviva Meter
Proper setup is crucial for accurate readings. This involves initial configuration, date/time settings, battery installation, and familiarizing yourself with the meter display.
Initial Setup and Date/Time Configuration
Upon first use, the Aviva meter requires initial setup to ensure accurate data tracking and personalized monitoring. This process typically begins with inserting the batteries, after which the meter will prompt you to configure the date and time. Accurate date and time settings are vital for correctly timestamping your blood glucose readings within the meter’s memory.
To set the date and time, navigate through the meter’s menu using the designated buttons. The user interface will guide you through selecting the month, day, year, hour, and minute. Confirm each selection to proceed. Some models may offer a 12-hour or 24-hour time format option; choose the one you prefer.
Correctly configured date and time settings are essential for effective data management and analysis of your blood glucose trends over time. Refer to the complete manual for specific button functions and menu navigation details for your Aviva meter model.
Installing Batteries
Proper battery installation is crucial for the Aviva meter to function correctly. Typically, the meter requires standard batteries, often AAA or AA size, depending on the specific model. Locate the battery compartment, usually found on the back or bottom of the device. Gently slide or lift the battery compartment cover to access the battery slots.
Insert the batteries, ensuring correct polarity – match the positive (+) and negative (-) ends with the markings inside the compartment. Incorrect battery insertion will prevent the meter from powering on. Once the batteries are securely in place, close the battery compartment cover until it clicks shut.
The meter’s display should illuminate, indicating successful battery installation. If the display remains blank, double-check the battery polarity and ensure the batteries are fresh. Regularly replace batteries to maintain accurate readings and consistent performance.
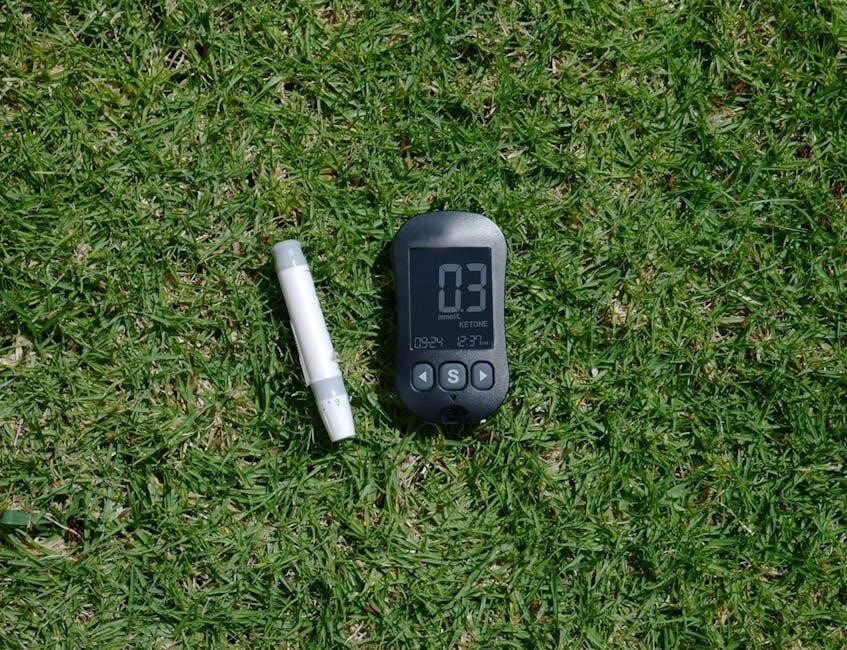
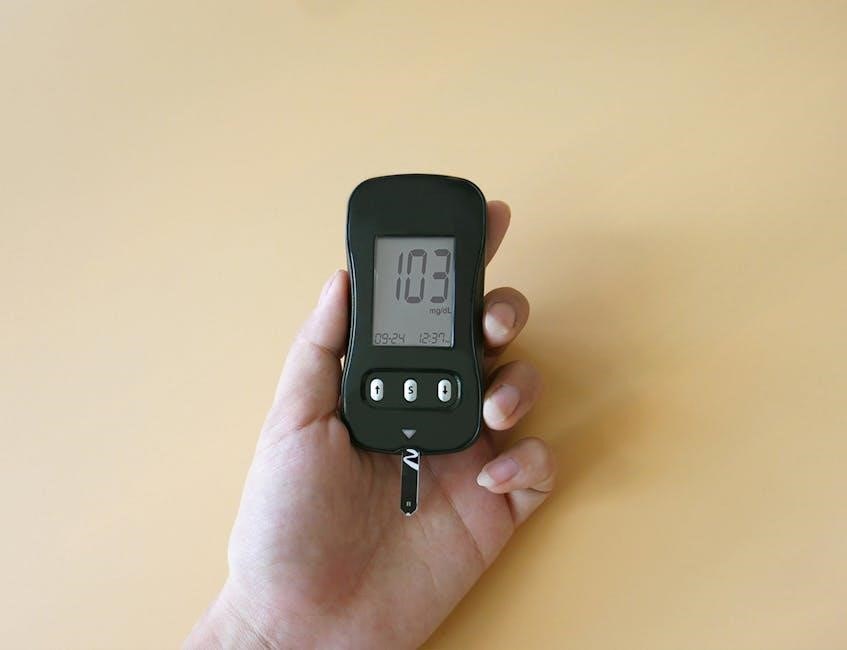
Understanding the Meter Display
The Aviva meter’s display provides essential information at a glance. Familiarizing yourself with its components is key to accurate monitoring. The primary area shows your current blood glucose reading, typically in milligrams per deciliter (mg/dL). A date and time display indicates when the test was performed, crucial for tracking trends.
Look for indicator icons: a battery level indicator alerts you to low battery status, while a test strip symbol confirms proper strip insertion. Error messages, if any, will appear on the display, signaling potential issues with the test or meter. Some models feature a ketone warning, alerting to potentially dangerous levels.
Understanding these symbols ensures you interpret results correctly. The meter may also display a memory icon, indicating stored test results are available for review. Refer to the manual for a complete explanation of all display elements.

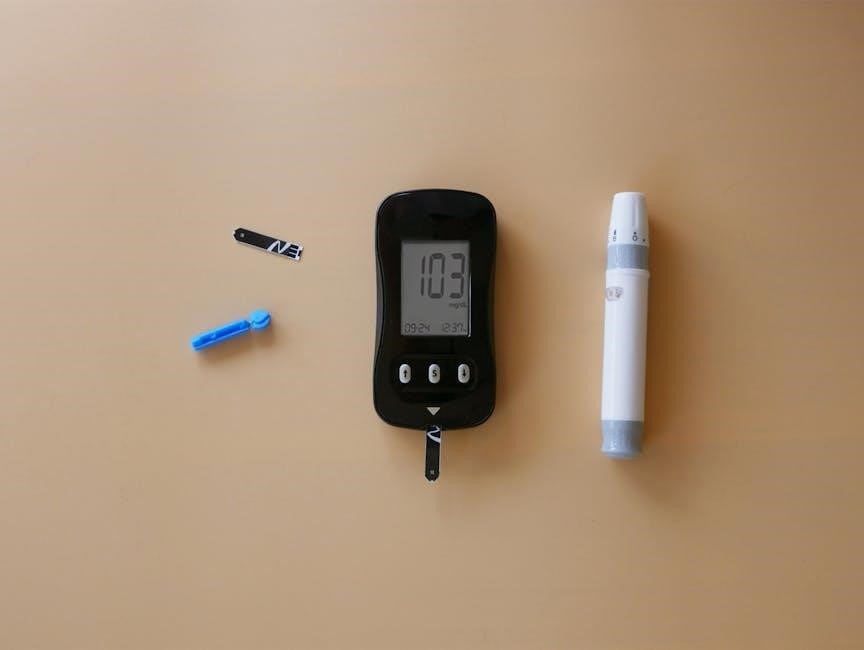
Performing a Blood Glucose Test
Accurate testing requires proper preparation of the lancing device, obtaining a sufficient blood sample, and applying it to the test strip correctly.
Preparing the Lancing Device
Before initiating a blood glucose test, meticulous preparation of the lancing device is crucial for a comfortable and accurate experience. Begin by ensuring the device is clean and functioning correctly. Attach a new, sterile lancet firmly into the lancing device, following the manufacturer’s instructions precisely. Adjust the depth setting on the device according to your skin type and desired blood flow – shallower settings are suitable for thinner skin, while deeper settings may be necessary for thicker skin.
Always use a fresh lancet for each test to prevent infection and ensure optimal sharpness. Avoid reusing lancets, as this can dull the needle and increase discomfort. Once the lancet is securely in place and the depth is set, cock the lancing device according to the device’s specific mechanism. This prepares the device to puncture the skin upon activation. Finally, select a testing site, typically on the side of a fingertip, avoiding areas with calluses or scars.
Obtaining a Blood Sample
After preparing the lancing device, the next step is to obtain a sufficient blood sample for accurate glucose measurement. Gently press the lancing device firmly against the chosen fingertip site. Activate the device by pressing the release button, allowing the lancet to quickly puncture the skin. Avoid squeezing the fingertip excessively before or during the puncture, as this can dilute the sample with tissue fluid and affect results.
A small, rounded drop of blood should form. If the blood flow is insufficient, gently massage the finger towards the puncture site, avoiding harsh squeezing. Wipe away the first drop of blood with a clean, dry cloth, as it may contain tissue fluid. Allow a second, larger drop to form, ensuring it’s adequately sized for the test strip; A proper sample size is vital for reliable readings.
Applying the Blood to the Test Strip
Once you have obtained a sufficient blood sample, carefully apply it to the designated test area on the Aviva test strip. Hold the strip firmly and present the blood drop to the sample port, allowing it to be drawn in automatically via capillary action. Do not smear or spread the blood onto the strip; let the meter draw in the required amount.
Ensure the sample port is fully covered with blood for an accurate reading. Insufficient blood can lead to error messages or inaccurate results. Avoid touching the test area with your fingers. The meter will typically indicate when enough blood has been applied, often with a visual cue or beep.
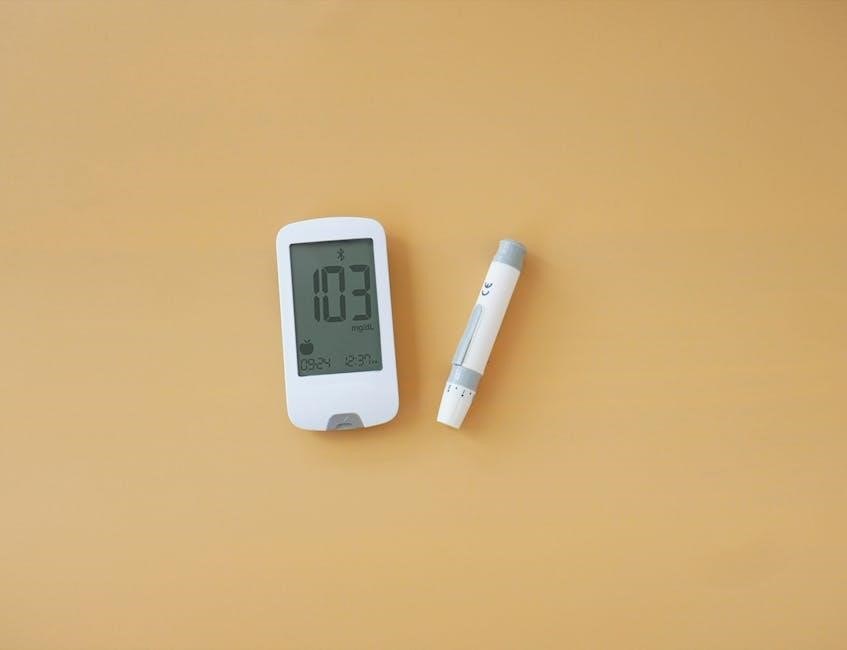
Reading and Interpreting Results
After applying the blood sample, the Aviva meter will display your blood glucose reading within a few seconds. The result is shown in milligrams per deciliter (mg/dL). Understand that blood sugar and blood glucose are interchangeable terms used throughout this manual.
Compare your reading to your target range, as determined by your healthcare professional. Factors like meals, exercise, and medication influence glucose levels. Keep a record of your results, noting the date and time of each test.
Be aware of high or low glucose alerts, if enabled, and consult your doctor if readings consistently fall outside your target range.
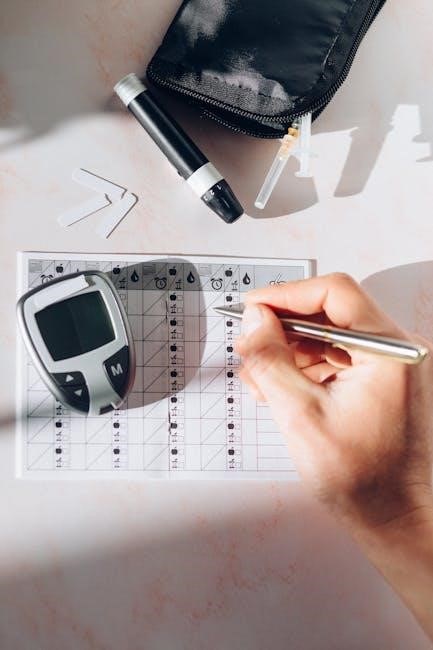
Meter Memory and Data Management
The Aviva meter stores test results, allowing you to access past readings and calculate averages for effective blood glucose monitoring and analysis.
Accessing Test Results Memory
Your Aviva meter diligently stores your blood glucose test results, providing a valuable historical record for tracking your health. To access this memory, typically you’ll use the meter’s navigation buttons. Often, a dedicated “Memory” or “History” button initiates the process. Pressing this button will display your most recent reading, and subsequent presses will cycle through older results, usually showing the date and time of each test alongside the glucose value.
The meter’s display will indicate the total number of readings stored in memory. Depending on the model, you may be able to view average readings over specific periods – such as 7, 14, or 30 days – directly within the memory function. Understanding how to navigate and review your stored data is crucial for identifying trends and making informed decisions about your diabetes management plan, in consultation with your healthcare provider. Refer to your specific meter’s detailed instructions for precise steps.
Calculating Average Blood Glucose Levels
The Aviva meter simplifies tracking your diabetes management by automatically calculating average blood glucose levels. This feature provides a broader perspective than single readings, revealing trends over time. Typically, you can access these averages through the meter’s memory function, often displaying 7-, 14-, or 30-day averages.
To view these, navigate to the memory section and select the desired averaging period using the meter’s buttons. The display will then show your average glucose level for that timeframe. Regularly monitoring these averages helps you and your healthcare provider assess the effectiveness of your treatment plan. Consistent tracking allows for adjustments to medication, diet, or exercise to optimize blood glucose control. Remember to discuss these averages with your doctor for personalized interpretation and guidance.
Deleting Test Results
The Aviva meter allows you to delete individual or all stored test results, providing control over your data and ensuring accuracy when reviewing trends. Access the meter’s memory function to initiate the deletion process. Typically, you’ll navigate through the menu options to find a “Delete” or “Clear” function.
You’ll usually be prompted to choose between deleting a single result or all stored data. Exercise caution when deleting, as this action is irreversible. Deleting results can be useful if a test was performed incorrectly or doesn’t accurately reflect your glucose levels. Regularly reviewing and deleting older data can also help maintain a manageable and relevant record. Always consult your healthcare provider before deleting significant portions of your test history.
Troubleshooting Common Issues
Addressing error messages, incorrect readings, and power failures is crucial for reliable monitoring. This section provides solutions for typical Aviva meter problems.
Error Messages and Their Meanings
The Aviva meter utilizes various error codes to signal potential problems during operation. Understanding these messages is vital for accurate blood glucose monitoring and troubleshooting. A common error might indicate an improperly inserted test strip, requiring removal and re-insertion, ensuring the correct orientation. Another message could signal a strip issue – perhaps damaged or expired – necessitating a replacement.
Insufficient blood sample application frequently triggers an error, prompting the user to repeat the test with a larger drop. Internal meter errors, though less common, may require contacting customer support. The manual details specific codes, like those related to memory limitations or communication failures during data transfer. Always consult the complete list within the Aviva manual for precise interpretations and recommended corrective actions. Ignoring error messages can lead to inaccurate results and compromised health management.
Incorrect Blood Glucose Readings
Obtaining inaccurate blood glucose readings can stem from several factors. Expired or improperly stored test strips are a primary cause, as their chemical reagents degrade over time. Contaminated fingers, or insufficient cleansing before lancing, can introduce substances affecting results. Applying too little blood, or wiping away the initial drop, also leads to errors.
Meter malfunction, though rare, is a possibility; ensure the device is functioning correctly. Environmental factors like extreme temperatures or humidity can influence strip performance. Comparing meter readings with symptoms is crucial; discrepancies warrant retesting and potentially consulting a healthcare professional. Regularly check the meter’s control solution to verify accuracy. Always follow the manual’s guidelines for proper testing technique and strip handling to minimize inaccuracies.
Meter Not Turning On
If your Aviva meter fails to power on, several troubleshooting steps can be taken. First, verify the batteries are correctly installed, observing proper polarity. Even new batteries may be defective, so testing with a fresh set is recommended. Inspect the battery compartment for corrosion or debris that could impede contact.
A completely discharged meter, after prolonged inactivity, might require a few minutes of charging via new batteries before responding. Ensure the power button is pressed firmly and held for a sufficient duration. If the issue persists, a potential internal malfunction could be the cause. Contacting customer support for assistance or considering meter replacement may be necessary. Avoid attempting to disassemble the meter yourself, as this voids any warranty.
Maintaining Your Aviva Meter
Regular cleaning and proper test strip storage are crucial for accurate results. Replace batteries as needed, and avoid harsh chemicals during disinfection.
Cleaning and Disinfection
To ensure accurate readings and prolong the life of your Aviva meter, regular cleaning is essential. Before cleaning, always disconnect the meter from any power source. Use a soft, damp cloth to gently wipe the exterior of the meter, removing any dust or debris. Avoid using harsh chemicals, abrasive cleaners, or solvents, as these can damage the meter’s components.
For disinfection, a 70% isopropyl alcohol solution can be used sparingly on the meter’s exterior. Apply the alcohol to the cloth, not directly onto the meter, and wipe gently. Ensure the meter is completely dry before reinserting test strips or using it again. Never immerse the meter in liquid, and avoid getting any liquid into the test strip port. Regular cleaning and disinfection contribute to maintaining a hygienic and reliable blood glucose monitoring system.
Test Strip Storage
Proper test strip storage is crucial for accurate blood glucose readings. Aviva test strips should be stored in their original vial, tightly closed, in a cool, dry place. Avoid exposing the strips to direct sunlight, heat, or humidity, as these conditions can degrade the test strip’s chemical reagents and compromise their performance.
Do not store test strips in the refrigerator or freezer. Ideal storage temperature is between 60°F and 86°F (16°C and 30°C). Once the vial is opened, use the strips immediately and reseal the vial tightly after each use. Discard any strips that are expired or appear damaged. Using expired or improperly stored test strips can lead to inaccurate results and potentially incorrect treatment decisions.
Battery Replacement
The Aviva meter requires batteries to operate. When the low battery indicator appears on the display, it’s time to replace the batteries. Typically, the meter uses two AAA batteries. Ensure you use high-quality alkaline or lithium batteries for optimal performance and longevity.
To replace the batteries, locate the battery compartment (refer to your meter’s specific diagram in the full manual). Carefully remove the old batteries, noting the correct polarity (+ and -). Insert the new batteries, again ensuring correct polarity alignment. Close the battery compartment securely. Incorrect battery installation can damage the meter. Dispose of used batteries responsibly, following local regulations for battery recycling.
Advanced Features & Settings
Explore customizable alerts for high/low glucose levels, and options for transferring data to computers or devices for comprehensive tracking and analysis.
Setting High and Low Glucose Alerts
The Aviva meter allows you to personalize your monitoring experience by setting customized high and low glucose alert levels. These alerts provide an extra layer of safety and awareness, notifying you when your blood glucose readings deviate from your target range. To configure these alerts, navigate to the meter’s settings menu. You’ll typically be prompted to enter your desired high and low thresholds – values that reflect your individual healthcare provider’s recommendations.
Carefully consider your target range when setting these alerts, as overly sensitive settings can lead to frequent, unnecessary alarms. Conversely, alerts that are too lenient may not provide sufficient warning. Once set, the meter will audibly and visually alert you when a reading falls outside your specified parameters, enabling prompt action and better glucose control. Regularly review and adjust these settings as needed, in consultation with your doctor.
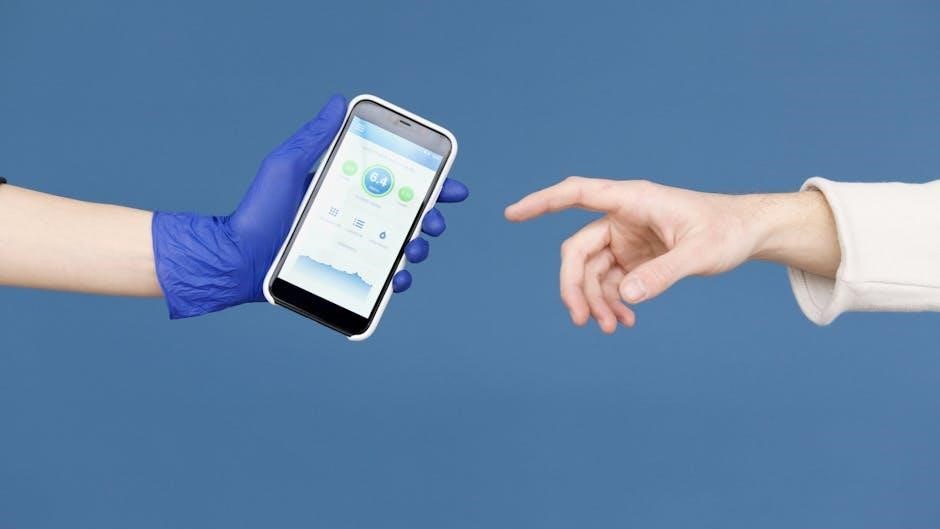
Data Transfer to Computers/Devices
The Aviva meter facilitates seamless data transfer, allowing you to download your blood glucose readings to compatible computers or mobile devices for comprehensive analysis and tracking. This feature empowers you and your healthcare team to gain deeper insights into your glucose patterns over time. Typically, this is achieved using a USB cable and dedicated software, often available for download from the manufacturer’s website.
The software enables you to visualize your data through graphs and reports, identify trends, and share information with your doctor. Some Aviva models may also support Bluetooth connectivity for wireless data transfer to compatible smartphones or tablets. Ensure your device meets the system requirements and follow the provided instructions for a successful connection. Regular data uploads contribute to more informed diabetes management decisions.
Customizing Meter Settings
The Aviva meter offers customizable settings to personalize your testing experience and align with your individual needs. You can adjust settings such as date and time format, glucose measurement units (mg/dL or mmol/L), and meter display preferences for optimal readability. Setting high and low glucose alerts is a crucial customization option, enabling the meter to notify you when your blood glucose levels fall outside your target range.
These alerts serve as proactive reminders to take appropriate action, helping you maintain better glucose control. Explore the meter’s menu to access these settings and tailor them to your healthcare provider’s recommendations. Remember to save your changes after each adjustment. Customization ensures the meter functions precisely as intended, supporting your diabetes management journey effectively.
Safety Precautions and Warnings
Properly dispose of sharps, avoid infection, and understand limitations. Home use is limited to capillary whole blood testing; blood sugar and glucose mean the same.
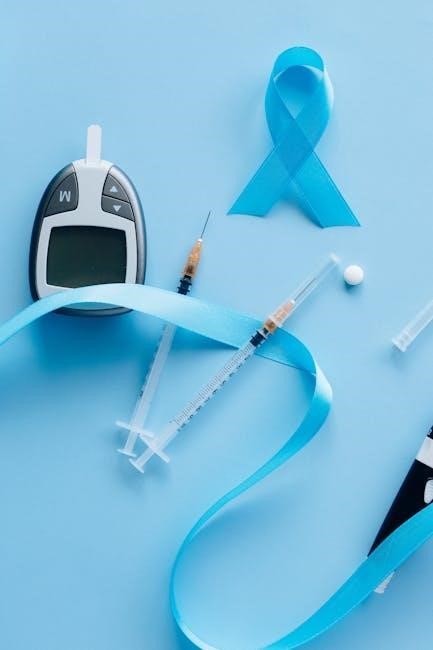
Proper Disposal of Sharps
Used lancets and test strips are considered “sharps” and pose a potential risk of injury and infection. Therefore, careful and responsible disposal is crucial. Never recap, bend, or break a used lancet. Immediately after use, dispose of lancets in an FDA-cleared sharps container. These containers are puncture-resistant and designed to prevent accidental needlesticks.
If a sharps container isn’t readily available, use a heavy-duty plastic container with a tight-fitting, puncture-proof lid – like a laundry detergent bottle. Clearly label the container as “Sharps – Do Not Recycle.”
Do not dispose of sharps in household trash or recycling bins. Contact your local waste management authority for specific guidelines on sharps disposal in your area. Many communities offer collection programs or designated drop-off locations. Following these guidelines protects sanitation workers, family members, and the public.
Avoiding Infection
Maintaining strict hygiene is paramount when performing blood glucose tests to prevent infection. Always wash your hands thoroughly with soap and warm water before and after testing. Ensure your testing site is clean; wipe the chosen finger with an alcohol swab and allow it to air dry completely before lancing.
Never share your Aviva meter, lancing device, or test strips with anyone else. These devices come into contact with blood and can transmit bloodborne pathogens. If another person uses your equipment, even family, the risk of infection increases significantly.
Regularly clean and disinfect your meter according to the manufacturer’s instructions. Proper cleaning minimizes the risk of bacterial growth. If you experience any signs of infection at the testing site – redness, swelling, pain, or pus – consult a healthcare professional immediately.
Contraindications and Limitations
The Aviva Blood Glucose Meter is intended for self-testing and professional monitoring of capillary whole blood glucose levels. Home use is limited to this specific application. It is not designed for use in critically ill patients within a hospital setting or for diagnosing diabetes.
Results obtained from alternative site testing (AST), such as the forearm, may differ from fingertip results, particularly when blood glucose levels are changing rapidly. Always confirm AST results with a fingertip test if discrepancies are suspected.
Individuals with severely dehydrated or hypotensive conditions should exercise caution when interpreting results. Hematocrit levels can influence accuracy; significant deviations from the normal range may affect readings. Consult your healthcare provider for guidance if you have concerns about the meter’s suitability for your specific medical condition.